First DAG
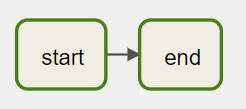
Let's start with a basic DAG with two tasks: start and finish.
Let's assume this DAG runs at 03:00 daily. Both of the tasks in the DAG use BashOperator to run a single command.
By following the five steps from the previous page, the DAG definition looks like the below:
Create a file named 1_first_dag.py that contains the following code:
# Step-1: Import Python modules
from datetime import datetime, timedelta
from airflow import DAG
from airflow.operators.bash_operator import BashOperator

# Step-2: Define default args
default_args = {
    "owner": "airflow",
    "depends_on_past": False,
    "retries": 1,
    "retry_delay": timedelta(minutes=5),
    "email": ["airflow@example.com"],
    "email_on_failure": False,
    "email_on_retry": False,
}

# Step-3: Instantiate DAG --- or creating a DAG object
dag = DAG(
    "1_first_dag",
    description="first dag",
    schedule_interval="0 3 * * *",
    start_date=datetime(2022, 2, 17),
    catchup=False,
    tags=["custom"],
)

# Step-4: Define Tasks
start = BashOperator(
    task_id="start",
    bash_command='echo "start"',
    dag=dag,
)

end = BashOperator(
    task_id="end",
    bash_command='echo "stop"',
    dag=dag,
)

# Step-5. Define task sequence and dependencies
start >> end
Note that we created a DAG object in this DAG, then associated it with every task in the pipeline. The DAG code can be verbose if you have many tasks in the pipeline.
To simplify it, Airflow provides another to define the DAG using context managers. Let's see how it works.